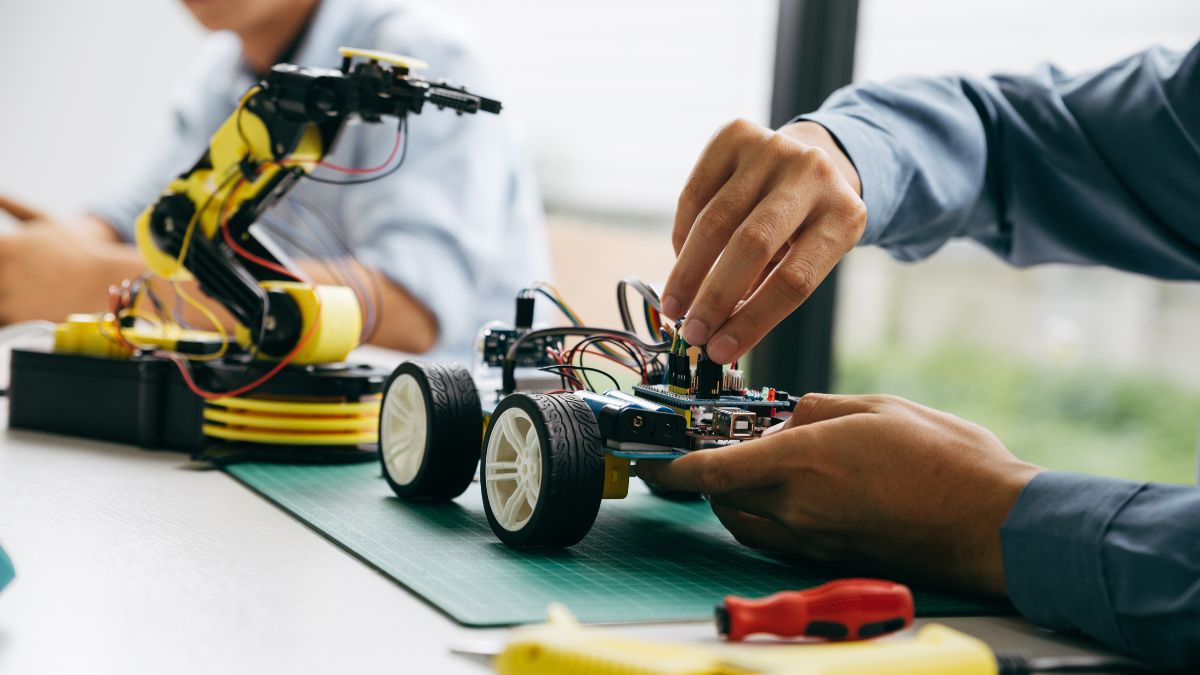
Starting with electronics and programming can feel like a jump into a deep pool. You might have heard of a tool called Arduino, which is a fantastic way for anyone to start building actual electronic devices. Arduino is simply an open-source electronics platform that uses easy-to-use hardware and software. It is a small circuit board with a little computer chip, called a microcontroller, that you can program to control things in the real world.
The beauty of Arduino is that it makes “physical computing” easy. This means you can connect things like sensors (to measure temperature or distance) and outputs (like lights, motors, or screens) to the board, and write simple code to make them work together. It acts as the brain for your simple electronic inventions. For example, it can read a signal from a light sensor and, based on that signal, turn on a motor. It is a powerful learning tool, but most beginners worry that their first projects will just be blinking lights that do not really help with anything.
The truth is, your first projects can be genuinely useful, solving small problems around your home and giving you a big sense of accomplishment. We are going to focus on three simple, beginner-friendly projects that go beyond basic learning and actually serve a practical purpose in your daily life. What kind of useful projects can a total beginner actually build with just a few components?
What is the simplest Arduino project that solves a real-world problem?
The simplest useful project a beginner can build is an Automated Plant Watering System. This device saves you the trouble of remembering to water your plants and keeps your greenery healthy even when you are away. It uses a very affordable and easy-to-use component called a soil moisture sensor, which you stick right into the dirt of your plant pot. This sensor checks how dry or wet the soil is by measuring how well the soil conducts electricity.
The way it works is beautifully simple: the soil moisture sensor sends an “analog” signal to the Arduino board, which is just a number representing the moisture level. You program the Arduino to check this number constantly. If the number drops below a certain point that you set (meaning the soil is too dry), the Arduino sends a signal to a small electronic switch called a relay. The relay then safely turns on a tiny water pump that is sitting in a reservoir of water. The pump runs, delivering water to the plant, until the moisture sensor detects that the soil is wet enough. Once the right level is reached, the Arduino turns off the pump. This closed loop system is a perfect introduction to using sensors, making decisions in code, and controlling a high-power device (the pump) safely using a low-power device (the relay).
How can I build a reliable digital thermometer with an Arduino?
You can easily build a reliable digital thermometer that is much more useful than just a blinking light by connecting a temperature sensor and a small display screen to your Arduino. The process is very direct and gives you an immediate, visible result. For this project, a common sensor like the LM35 or a slightly more complex but popular sensor like the DHT11 (which also measures humidity) is used. The LM35 is particularly simple because its voltage output changes directly with the temperature, making the math inside the Arduino code very straightforward.
Once the sensor is wired up, the Arduino reads the raw data it provides. This reading is then converted into a human-readable temperature in Celsius or Fahrenheit using a simple mathematical formula in your code. The most important part for usability is the display. A small 16×2 LCD screen is a perfect choice because it is affordable and easy for beginners to control. You program the Arduino to send the calculated temperature value to the screen, updating the reading every few seconds. This project is useful because it teaches you how to handle different types of data, how to display information clearly, and how to create a standalone, portable device that you can use to monitor the climate in any room, a greenhouse, or even a server cabinet.
Why is a distance measuring tool a great beginner project?
A distance measuring tool is an excellent beginner project because it introduces the key concept of using sound to measure space, which is an important feature in many robotics and automation applications. This project relies on the HC-SR04 ultrasonic sensor, which is widely available and very simple to interface with the Arduino. The sensor works like a bat: it sends out a high-frequency sound wave (too high for humans to hear) and then waits for the echo to return after bouncing off an object.
The magic happens when the Arduino uses the time delay between sending the sound wave and receiving the echo to calculate the distance to the object. Since the speed of sound is known, the code simply takes the total travel time, multiplies it by the speed of sound, and divides it by two (because the sound traveled to the object and back). The final distance, often displayed on a small OLED or LCD screen, is highly accurate. This project is immediately useful as a digital tape measure, a height-of-liquid meter in a tank, or as the basis for a future parking assist device that tells you how close your car is to the garage wall.
How does an automatic pet feeder use an Arduino microcontroller?
An automatic pet feeder is another fantastic, practical project that uses the Arduino to manage time and motion, making it a valuable device for busy pet owners. Instead of a sensor that measures an environmental factor like moisture or distance, this project uses a Real-Time Clock (RTC) module and a servo motor. The RTC module is essential because it keeps track of the actual time and date, even when the main Arduino power is off, thanks to a small onboard battery.
You program the Arduino to check the time from the RTC module. When the current time matches a pre-set meal time you defined in the code (for example, 7:00 AM and 6:00 PM), the Arduino wakes up and sends a signal to the servo motor. A servo motor is an ideal component here because it can be programmed to turn to a very specific angle and then stop. By attaching a small dispenser or gate mechanism to the motor, you can make the motor turn a precise amount to release a measured portion of pet food into the bowl. This project teaches you about time control, scheduling events, and precise movement control using motors, which are skills needed for countless advanced robotics projects.
What is the most critical component for making an Arduino project practical?
The most critical component for making an Arduino project truly practical is not the Arduino itself, but the Input/Output (I/O) component that connects it to the real world. I/O stands for Input (like sensors that gather information) and Output (like motors, lights, or displays that perform an action). Without practical I/O, an Arduino is just a tiny, programmable calculator.
Consider the three projects discussed: the plant waterer relies on the soil moisture sensor (Input) and the water pump/relay (Output); the digital thermometer depends on the LM35/DHT11 sensor (Input) and the LCD screen (Output); and the distance meter uses the ultrasonic sensor (Input) and a display (Output). In all cases, the usefulness comes from the system being able to observe its environment and then perform a physical task or display useful information. Beginners should always focus on projects that use at least one sensor and one actuator (something that moves or changes the world) or a clear, informative display.
How does the Arduino software make these projects easy for beginners?
The Arduino software, known as the Arduino Integrated Development Environment or IDE, is what makes these projects accessible even for people with no programming background. The IDE uses a programming language that is based on C++, but it simplifies many of the complicated parts. The programming structure is very clear: you have a setup() section, which runs only once when the device turns on, and a loop() section, which runs over and over again forever.
This simple setup/loop structure helps a beginner quickly understand how the program controls the device’s behavior. Additionally, the Arduino community has created countless libraries, which are collections of pre-written code. For example, instead of a beginner needing to write hundreds of lines of complex code just to make an LCD screen work, they can simply include the existing LCD library and use simple commands like lcd.print("Hello!"). These libraries reduce the barrier to entry, allowing a beginner to focus on the overall logic of the project (the “what” and “when”) rather than the super-technical details of every single component (the “how”).
Why are these projects better than just blinking an LED?
These specific projects are significantly better than simply making an LED light blink because they introduce the core elements of engineering and problem-solving. A blinking LED is the “Hello World” of electronics and is vital for learning the absolute basics of uploading code and powering a circuit. However, it is a closed system that only interacts with itself.
The projects we have discussed are interactive and situational. The plant waterer reacts to the dryness of the soil. The thermometer reacts to changes in air temperature. The distance meter reacts to the presence of an object. This interaction between the device and its environment is the heart of physical computing, robotics, and the Internet of Things (IoT). By creating a functional, useful device, a beginner moves from just being a coder who writes instructions to being a maker who designs and builds solutions. This transition dramatically increases engagement, critical thinking skills, and a deeper understanding of how electronics are used to automate the world around us.
Starting with Arduino is an exciting journey into building devices that can sense, think, and act. By focusing on practical projects like the Automated Plant Watering System, the Digital Thermometer, or the Ultrasonic Distance Meter, you skip past simple novelty and dive straight into useful, functional creation. These beginner-friendly projects teach you core skills with sensors, displays, and motors, giving you a strong base for future, more complex inventions.
Which of these practical inventions do you think would be the most immediately helpful to your daily routine, and what one extra feature would you program it to do?
FAQs – People Also Ask
Is Arduino a difficult language to learn for a beginner?
No, the Arduino programming language, which is based on C++, is specifically designed to be easy for beginners. It is simplified with a clear structure of setup and loop functions, which makes the learning curve gentle. Most basic projects only require learning a handful of simple commands, and the large community provides countless examples and ready-to-use code libraries that help reduce complexity significantly.
What is the most important part to buy for an Arduino project?
The most important part to buy after the Arduino board itself is a good starter kit that includes a variety of common sensors, LEDs, buttons, and a breadboard. The breadboard is a plastic board with holes that lets you connect wires and components without soldering, which is essential for easy prototyping and experimentation as a beginner.
Can I use an Arduino project to save money in my home?
Yes, you can. Projects like the automatic plant watering system can save you money by preventing you from killing expensive plants due to over or under-watering. Other popular projects, such as a temperature-controlled fan or light-sensitive automatic street lights, can help save on electricity bills by only running devices when they are actually needed.
What is the difference between Arduino and Raspberry Pi?
Arduino is primarily a microcontroller used for controlling hardware, reading sensors, and performing repetitive tasks quickly and reliably in real-time. Raspberry Pi is a full single-board computer that runs an operating system (like Linux) and is better suited for complex tasks that need an operating system, such as running a web server, complex image processing, or general computing. Arduino is typically better for simple electronic control.
How long does it take to build a simple Arduino project like a thermometer?
A complete beginner, following a good tutorial, can typically assemble and program a simple project like a digital thermometer within a few hours. The wiring is straightforward, and the code involves basic reading of a sensor and sending data to a small screen. The time is mostly spent ensuring the connections are correct and understanding the simple logic of the code.
Does Arduino require me to know how to solder?
For basic and many intermediate projects, you do not need to know how to solder. The use of a breadboard and jumper wires allows you to connect all components temporarily by simply pushing the wires into holes. Soldering is only necessary when you want to make a project permanent, durable, or very compact, which is usually a later step for hobbyists.
What kind of sensors are best for beginners to use?
The best sensors for beginners are simple and cheap ones like the LED (Light Emitting Diode) to control light output, the PIR (Passive Infrared) motion sensor for detecting movement, the LM35/DHT11 for temperature/humidity, and the HC-SR04 ultrasonic sensor for distance. These sensors are easy to wire and have well-supported, simple code libraries.
What is a “sketch” in Arduino programming?
A “sketch” is simply the name given to a program written for the Arduino board. The term is used to reflect the idea that these programs are often small, quick, and experimental, like a designer’s sketch on paper. You write your code in the Arduino IDE and then upload the sketch to the Arduino board to make it run.
Can I connect an Arduino project to my phone or the internet?
Yes, you can. While the basic Arduino Uno does not have built-in Wi-Fi, you can add an extra component called a Wi-Fi module (like the ESP8266 or an Ethernet shield) to connect your project to the internet. This allows you to monitor your plant waterer remotely, receive alerts on your phone, or log temperature data online, turning a simple project into an Internet of Things (IoT) device.
How do I troubleshoot an Arduino project when it is not working?
When an Arduino project is not working, you should always start by checking the power supply and connections first, a process called debugging the hardware. Look for loose wires or incorrectly placed components on the breadboard. If the hardware is correct, then move to debugging the code, which usually means adding simple commands to the code to print values to the Serial Monitor to see if the Arduino is reading the sensor data correctly.