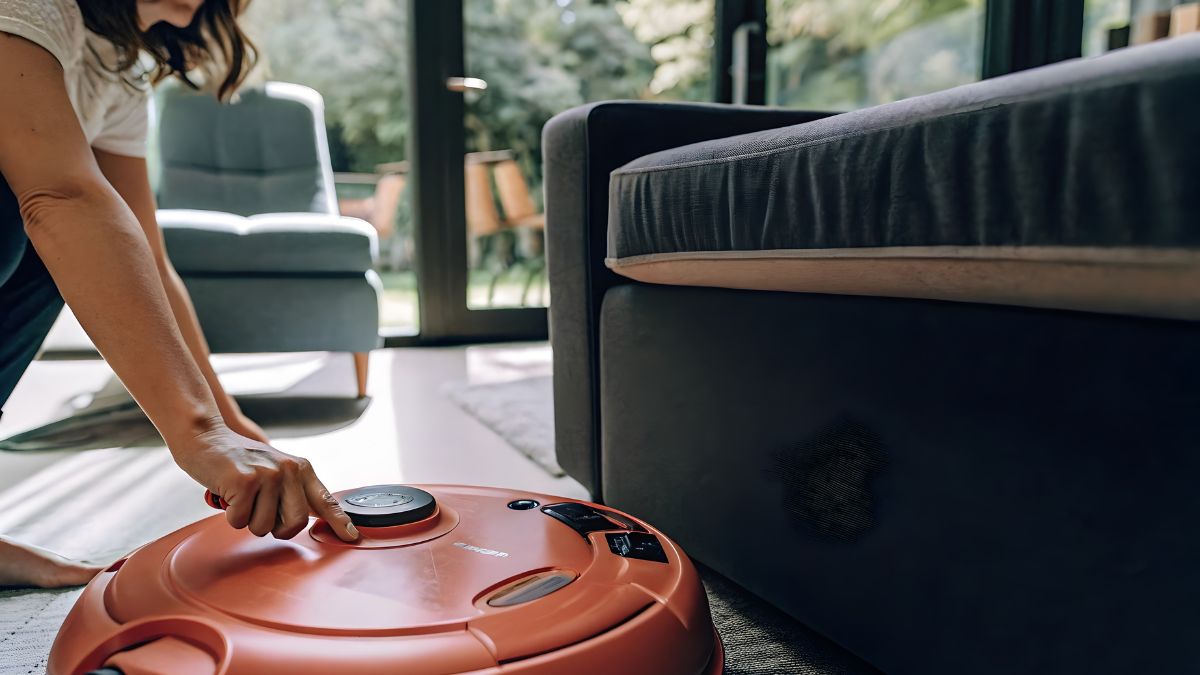
Robot vacuums are one of the most popular smart home gadgets today. They zoom around your house, cleaning up dust and pet hair while you relax on the sofa. It is easy to see why so many people want one. However, when you look at the prices of the best models, the cost can be quite high. Even simple, brand-name vacuums often start at well over $150 or $200.
This has made many people interested in a do-it-yourself or DIY solution. The idea of building your own smart helper for a low price is exciting. You can choose the exact parts you want, learn about electronics, and save a lot of money at the same time. It feels like a smart challenge for anyone interested in basic engineering or coding.
The goal of building a custom robot vacuum for under $100 is very ambitious, especially in 2025 with rising component costs. Most people expect a robot that not only drives but also sucks up dirt and avoids bumping into everything. Can we truly gather the core parts for a functional, automatic cleaning bot while sticking to a very tight $100 budget?
What Are the Essential Components of a Basic Robot Vacuum?
To understand the budget challenge, we first need to break down the robot into its necessary parts. Every cleaning robot, from the cheapest to the most expensive, needs three main groups of parts to function. First, it needs a brain, which is the microcontroller or mini-computer that runs the code. This is what decides where to go and what to do next. Second, it needs movement, which means motors, wheels, and a way to power them with a battery. Third, and most importantly for a vacuum, it needs a cleaning system, which includes a fan or motor for suction, a brush, and a place to hold the dirt. A basic DIY build can skip the fancy features like mapping or Wi-Fi control, but it cannot skip these three core elements. Skipping any of them just means you have a simple remote-control car, not a vacuum.
Is a Microcontroller Affordable Enough for a Cheap DIY Project?
Yes, the brain of the robot is surprisingly affordable, which helps the low-cost goal significantly. Many DIY builders choose a board like the Arduino Uno or a tiny, powerful option like the ESP32. The Arduino Uno is a classic choice for beginners because it is very easy to use and has a huge community online to help with problems. In 2025, you can often find basic versions or compatible clone boards for around $5 to $15. The ESP32 is even better for robot projects because it is also very cheap, often under $10, and it already has built-in Wi-Fi and Bluetooth. This means if you ever want to control your robot with a phone app, the ESP32 is already ready to go. Because these parts are mass-produced and widely available, they are the most budget-friendly part of the entire project.
How Much Do Motors and Movement Parts Cost for a Simple Robot?
The cost of moving the robot depends on how fast and powerful you want it to be. For a simple robot, you need at least two motors and a driver board to control their speed and direction. Simple geared DC motors, which are often used in small toys and DIY kits, can be bought in pairs for about $5 to $10. These motors are weak, but they are enough to push a very light plastic or cardboard chassis. You will also need wheels, which can sometimes be salvaged from old toys, or bought for a few dollars. The most important piece of the movement system is the motor driver board, like an L298N module. This board connects the motors to the microcontroller and makes it possible for the code to tell the robot to move forward, turn, or stop. A basic motor driver will cost about $5 to $10. For a super-simple movement system, you are likely looking at a total cost of about $20 to $30.
What Is the Biggest Budget-Buster in a DIY Robot Vacuum?
The biggest budget problem is the “vacuum” part itself. To genuinely suck up dirt, you need a powerful, high-speed motor and a fan that can move a lot of air. Most cheap DIY projects use a small computer cooling fan, which costs about $5. The problem is that these fans are designed to move air quickly, not to create strong suction through a narrow opening, which is what a vacuum cleaner does. A proper suction motor, which is similar to what a commercial robot vacuum uses, costs significantly more. Even a low-power handheld vacuum motor you might try to repurpose can be $15 to $25 by itself, not counting the housing and filtering. If you want any real cleaning power that is better than a simple electric broom, this part alone can easily push your total project cost toward the $50 to $70 range, leaving very little money for the other necessary components.
Can a Robot Vacuum Be Made Without Any Sensors?
While it is possible to build a robot that moves without any sensors, it will be quite useless for cleaning. A sensorless robot would simply drive straight until it hits a wall and then stop, or it might get stuck in a corner forever. To be a “robot vacuum,” it needs a basic ability to navigate and avoid large objects. The cheapest sensors for this are infrared (IR) or ultrasonic distance sensors. IR sensors, which are like tiny eyes that see how far away a wall is, cost as little as $1 to $2 each. Ultrasonic sensors, which use sound waves like bats, are a bit more accurate and cost around $3 to $5 each. To make a robot that avoids walls on the front and sides, you would need at least three of these cheap sensors. Adding even four of these basic sensors only adds about $10 to $20 to your budget, making them a must-have part that is still budget-friendly. This small investment changes the robot from a random bumper to a genuine obstacle-avoider.
How Can I Keep the Chassis and Power Costs Down to Meet the Budget?
To successfully hit the under $100 target, you have to be very smart and thrifty with the rest of your materials. The chassis, which is the main body of the robot, should be built from recycled or very cheap materials. Forget about fancy 3D-printed parts or buying custom metal plates. Instead, look for a suitable plastic food container, a sturdy cardboard box, or thin plywood scraps. These materials are nearly free or very inexpensive and can be easily cut and glued. The power source is another place to save. You can avoid expensive rechargeable lithium-ion battery packs and instead use a small set of AA batteries or an old USB power bank that you might have lying around. The key is to keep the entire build very light, so the small, cheap motors can move it without needing a huge, costly battery to power it all day long. A very careful builder might manage to keep the total cost of the chassis and power under $10.
What Are the Trade-Offs for Building a Robot Vacuum Under $100?
The biggest trade-off for staying under $100 is performance. This custom robot will not clean nearly as well as even the cheapest store-bought model. Its suction power will be very low, maybe only strong enough to pick up light crumbs or strands of hair, not heavy dust embedded in a carpet. Its navigation will be simple, likely a “random bounce” pattern where it drives until it hits something, then turns and drives again. It will not have smart mapping, zone cleaning, or app control unless you get very lucky with component prices. You also need to accept that you will be doing a lot of the work. This is a project for learning and fun, not a replacement for a professional, automated cleaning solution. It is a simple sweeper and a fun coding project, not a powerhouse vacuum, and that is a key difference to understand when you start building on a tight budget.
Conclusion
The answer to the main question is a qualified yes: you can build a custom, functional robot vacuum for under $100, but only if you accept some important trade-offs. The low cost is possible by choosing cheap microcontrollers like Arduino or ESP32, using basic motors and sensors, and building the body from salvaged materials like cardboard or plastic containers. The biggest challenge is the suction system, which is where almost all the money for a decent vacuum goes. Your final product will be a simple, battery-powered sweeper that avoids walls, not a smart, deep-cleaning machine with high-end features. It will be a perfect, rewarding project for learning about robotics and coding, but it will not replace a high-end commercial vacuum. The true value lies not in the cleaning power, but in the knowledge you gain and the fun you have building it.
Now that you know what goes into a very cheap robot, what advanced feature, like a tiny mop or a voice command, would be the most difficult to add to this basic $100 model without breaking the bank?
FAQs – People Also Ask
What is the minimum cost to build a simple cleaning robot?
The absolute minimum cost to build a basic sweeping or cleaning robot, without strong vacuum suction, is around $40 to $60. This estimate includes the essential parts: a cheap microcontroller board (about $10), basic drive motors and a controller (about $20), and a few simple obstacle-avoidance sensors (about $10). You must also be able to build the chassis from very cheap or free materials, like old plastic containers, and use an existing power bank or cheap batteries.
Why do commercial robot vacuums cost so much more than a DIY one?
Commercial robot vacuums cost much more because they include high-end technology and powerful parts. They have expensive components like LiDAR sensors for mapping your home accurately, powerful suction motors that really clean carpets, and long-lasting lithium-ion batteries. They also include the cost of professional engineering, software development for smart apps, brand warranties, and slick retail packaging, all of which add to the final price.
Is an Arduino or ESP32 better for a beginner robot vacuum project?
For a beginner robot vacuum project, both are good, but the ESP32 is generally better. The Arduino is simpler to start with and has a huge community, making it very easy to find help. However, the ESP32 is slightly more powerful, often cheaper, and most importantly, it has built-in Wi-Fi and Bluetooth. This means if you ever want to upgrade your robot to be controlled by your phone, the ESP32 already has the hardware you need without having to add more components.
What kind of motor should I use for vacuum suction in a DIY robot?
You should avoid using a standard computer cooling fan because it does not create enough concentrated suction to lift dirt. For better results, you should look for a small, high-speed brushless DC (BLDC) motor combined with a small impeller (fan). Even a motor salvaged from a small, broken handheld car vacuum or a small drone motor can provide better suction than a simple computer fan, but these usually cost more than the other drive motors.
Can a DIY robot vacuum map my house?
A basic, under $100 DIY robot vacuum will not be able to map your house. Mapping requires an expensive sensor called LiDAR (Light Detection and Ranging) or a powerful camera combined with a lot of processing power, which a cheap microcontroller cannot handle. A budget DIY robot will only use simple sensors to avoid obstacles, essentially cleaning by bouncing around randomly until it covers the entire area over time, which is called a “random bounce” algorithm.
What are the main limitations of a cardboard or plastic chassis?
The main limitations of a cardboard or plastic chassis are durability and stability. Cardboard can easily get damaged if it gets wet, and both materials can bend or crack if the robot bumps into a hard object too many times. Also, these lightweight materials may not provide enough weight or structure to keep the robot’s drive wheels firmly planted on the floor, which can cause the robot to slip or get stuck more easily than a robot with a heavier, sturdier body.
How can I make my cheap DIY robot vacuum smarter?
You can make your cheap DIY robot smarter by improving the code and adding a few more affordable sensors. Instead of just stopping and turning when it hits something, you can program it to follow a wall for a distance or to trace a boundary. Adding simple cliff sensors to the front can prevent it from falling down stairs. Connecting an ESP32 to Wi-Fi allows you to send simple commands from your phone, like “start” or “stop,” making it feel much smarter.
Can I build a robot vacuum that also mops the floor?
Yes, you can build a robot that mops, and it is actually easier to add a simple mop feature than to build a good vacuum. A simple mopping function only requires attaching a damp cloth or microfiber pad to the back of the robot. The robot simply drags the wet cloth behind it as it drives. You can even add a small, cheap water reservoir and a gravity-fed or simple pump system to keep the cloth wet, adding very little to the total cost.
Where can I buy the cheapest electronic components for a robot?
The cheapest electronic components for a DIY robot are generally found on large online marketplaces that ship directly from manufacturers in other countries. Websites that specialize in hobby electronics and bulk orders are also good options. Look for starter kits or bundles that combine common parts like the microcontroller, motor driver, and sensors, as buying them in a set is often much cheaper than buying each item separately.
What is the most common mistake for first-time robot builders?
The most common mistake for first-time robot builders is underestimating the power needs and the complexity of the wiring. People often forget that the motors need much more power than the microcontroller and must be connected through a separate motor driver board. If you try to power the motors directly from the microcontroller, you will likely damage the board. Proper wiring and choosing a strong enough battery are crucial for the robot to move reliably.